Are you ready for an exciting dive into the world of strategic basketball defense? Buckle up, because today, we are unraveling the mystique of the 1-1-3 Zone Defense. Often overlooked, this versatile and adaptive defensive tactic gives teams the power to disrupt opposing offenses, leaving them scrambling for scoring opportunities. Whether you’re a seasoned basketball enthusiast or a curious newcomer, we have you covered in our fun yet professional exploration of the 1-1-3 Zone Defense. So let’s lace up those sneakers and get ready to master the intricacies of this dynamic basketball strategy!
What’s a 1-1-3 Zone Defense in Basketball?
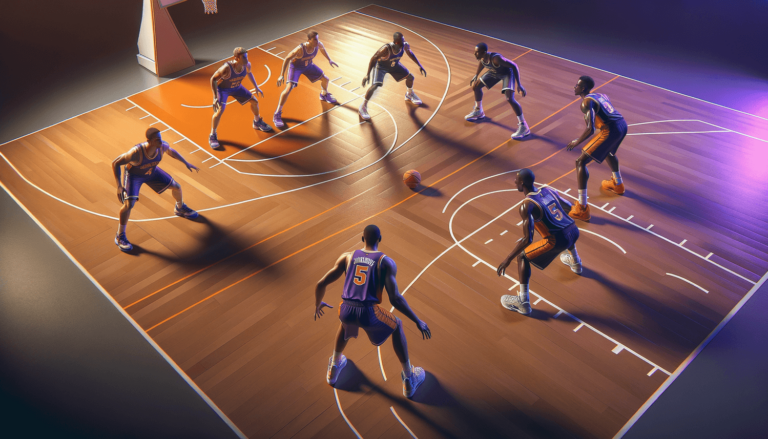
A 1-1-3 Zone Defense is a basketball defensive strategy where one player guards the point (usually the point guard), another covers the free-throw line area, and the remaining three defenders form a line across the court near the baseline. This configuration helps protect the paint, force turnovers, and disrupt the opposing team’s offensive rhythm by limiting penetration, contesting outside shots, and enabling quick transitions to other defensive setups.
Uncovering the Strategy of 1-1-3 Zone Defense
Let’s take an exciting journey through the world of basketball and delve into the key components of a 1-1-3 Zone Defense that make it such an effective and disruptive strategy. We’ll break down the positioning of players, the advantages it offers, and even outline some tips and tricks to help you effectively integrate it into your own game. Ready, set, let’s talk some basketball!
Breaking Down the Positions
Before we jump into the intricacies of the 1-1-3 Zone Defense, it’s essential to understand the positioning of players on the court. Here’s a breakdown of how each player aligns in this defensive setup.
The Point Guard (Top of the Key Defender)
The point guard, who usually takes on this role, is responsible for guarding the point at the top of the key. Their primary objective is to pressure and contain the ball handler, limiting their ability to penetrate or make easy passes. The point guard must have excellent lateral quickness to cover the ground and anticipate the offensive player’s movements effectively.
The Free-Throw Line Defender
The player covering the free-throw line area, typically a shooting guard, small forward, or quick power forward, is responsible for disrupting passes and attacking the high post when the offensive team is attempting to run plays through this crucial location. The free-throw line defender aims to hinder the decision-making process of the offense by obscuring their line of sight and disrupting any attempts to enter the ball into the post area.
The Three Baseline Defenders
The three remaining players, usually two forwards and the center, are positioned across the court near the baseline. Their primary responsibility is to protect the rim and contest any attempts to drive or pass the ball into the paint. They also need to be prepared to close out on shooters hovering around the perimeter, so having good court awareness and speed in reacting to their offensive counterparts is crucial. The baseline defenders work in unison, with one covering the strong side block, the other at the center near the hoop, and the third on the weak side block.
Advantages of the 1-1-3 Zone Defense
Now that we have a firm grasp of how the 1-1-3 Zone Defense positions players on the court, let’s explore the benefits this configuration offers to the team that deploys it.
1. Protecting the Paint
By positioning three defenders near the baseline, the 1-1-3 Zone Defense effectively reduces penetration opportunities for the offensive team. Opponents attempting to drive to the basket are likely to face a wall of tall and potent shot blockers, thereby diminishing their chances of scoring in the paint. This setup also makes it difficult for the offense to accomplish effective interior passing, resulting in a higher chance of turnovers.
2. Forcing Turnovers
The aggressive positioning of the top defender and the free-throw line defender allows for increased opportunities to force turnovers. By disrupting passing lanes and anticipating the opponent’s offensive play, defenders in a 1-1-3 Zone Defense can intercept passes, pressure ball handlers into making errors, and create fast-break opportunities for their team.
3. Covering the Perimeter
While the 1-1-3 Zone Defense places a significant emphasis on protecting the paint, it doesn’t neglect the importance of contesting perimeter shots. Because the three baseline defenders collaborate to cover the court’s width, they’re well-prepared to close out on perimeter shooters when the ball is swung from one side to the other. It’s worth noting that effective communication is critical in this scenario, as defenders must quickly decide who will contest the shooter and who will cover their original responsibilities.
4. Flexible Adaptation and Transition
One of the hallmarks of a 1-1-3 Zone Defense is its ability to seamlessly transition to other defensive configurations, such as the more conventional 2-3 zone, depending on the specific circumstances during a game. With just a few minor adjustments, your team can quickly shift and adapt to the opposing offense, keeping them off-balance and uncomfortable.
Keys to Implementing a Successful 1-1-3 Zone Defense
Implementing a 1-1-3 Zone Defense into your game plan can be a game-changer. However, there are a few essential keys to ensure its success on the court.
1. Communication is Crucial
Given its dynamic nature, a 1-1-3 Zone Defense relies heavily on constant and effective communication between players. Defenders must be vocal, calling out screens, switches, and other offensive approaches in real-time. Failure to communicate can result in a complete breakdown of the defense, leading to easy scoring opportunities for the opposition.
2. Anticipation and Quick Decision-Making
In addition to communication, effective 1-1-3 Zone Defense players must be able to anticipate their opponents’ next moves and make quick decisions. Because the defense is designed to disrupt offensive flow, it’s vital that your defenders can read the situation and quickly decide when to jump into passing lanes or contest shots, without leaving their teammates exposed.
3. Active Hands and Strong Positioning
Players in a 1-1-3 Zone Defense should be constantly active, keeping their hands up to disrupt passing lanes, and employing strong positioning to deny their opponents easy looks at the basket. Ensuring these fundamentals are drilled into your players during practice will significantly enhance the overall effectiveness of the 1-1-3 Zone Defense on game day.
4. Rebounding and Boxing Out
A key area often neglected in zone defenses is rebounding. Since the 1-1-3 Zone Defense is designed to contest shots and force opponents into difficult attempts, your players must focus on securing defensive rebounds to deny second-chance opportunities. Encourage your players to box out their opponents and attack the glass, ensuring they’re ready to collect the rebound if and when the shot misses.
Utilizing the 1-1-3 Zone Defense to Its Full Potential
Now that we have a comprehensive understanding of the 1-1-3 Zone Defense, it’s up to you to put these concepts into practice. From positioning and player responsibilities to the numerous advantages the defense can provide, you have all the tools necessary to integrate this disruptive strategy into your game plan. With hard work, dedication, and a continuous focus on communication and anticipation, your 1-1-3 Zone Defense can lead your team to many victories on the basketball court.
Adjusting the 1-1-3 Zone Defense to Counter Opposing Offenses
While the 1-1-3 Zone Defense is a powerful asset in your team’s defensive arsenal, it’s essential to recognize that it may require adjustments based on the opposition’s style of play. Let’s dive into modifying the 1-1-3 Zone Defense to counter various offensive strategies and enhance its effectiveness.
Overlap and Rotate to Limit Three-Point Opportunities
One potential vulnerability of the 1-1-3 Zone Defense is its susceptibility to skilled three-point shooters. To mitigate this, defenders must be prepared to overlap and rotate efficiently when needed. This approach requires the weak-side defenders to shift towards the ball-side to contest perimeter shooters quickly, while the remaining defenders rotate and cover their abandoned zones. Mastery of this technique can help your team limit open three-point opportunities for the opposition.
Guarding Dynamic Offensive Players
When facing opponents that possess a dynamic offensive player capable of creating their shots, your 1-1-3 Zone Defense must adapt. In this scenario, you can instruct the primary point defender to focus on this specific threat, using their defensive prowess to limit the star player’s scoring capabilities. Other defenders should remain alert and prepared to provide help defense as needed, but the main responsibility falls on the point defender to contain this offensive weapon and minimize their impact on the game.
Traps and Deflections with the 1-1-3 Zone Defense
We’ve touched on forcing turnovers as an advantage of the 1-1-3 Zone Defense, but let’s examine another variation that emphasizes this aspect: incorporating traps and deflections.
Setting Traps in the Half-Court
As the ball moves across the half-court line, your team can take advantage of the 1-1-3 Zone Defense to apply immediate pressure on the ball handler. The point defender and the free-throw line defender, often called the “interceptors,” set traps near the sideline or the corners of the court, utilizing their length and quickness to force turnovers or elicit deflections.
Executing Steals and Deflections
By incorporating traps into your 1-1-3 Zone Defense, you increase the likelihood of stealing the ball or deflecting passes from your opponents. The top defender is responsible for aggressively pressuring the offensive player, while the free-throw line defender and baseline defenders stay alert and ready to dive into passing lanes or recover loose balls. Conditioning your defenders to maintain an aggressive mindset while remaining fundamentally sound will maximize the chances of forcing turnovers and initiating fast-break opportunities for your team.
Preparing Your Team for 1-1-3 Zone Defense Success
Transitioning your team to a new defense strategy such as the 1-1-3 Zone Defense requires patience, practice, and dedication. To ensure your team is ready to deploy this strategy on game day, follow these tips during your practices and preparations.
Drills and Exercises
Consistently implement drills and exercises to help your players master the aspects of the 1-1-3 Zone Defense. These drills should focus on maintaining defensive intensity, quick rotations, anticipating passes, closing out on shooters, and securing rebounds. The more time your team spends practicing these skills, the more comfortable and proficient they’ll become with the 1-1-3 defensive strategy.
Game Situation Simulations
Utilize scrimmages and intra-squad games to simulate real-game situations where your team can implement the 1-1-3 Zone Defense against a wide variety of offensive setups. Encourage your players to communicate, make adjustments, and practice their rotations as they would during a competitive match. These simulation sessions will help create a realistic environment for your players to test their skills and develop their confidence in the 1-1-3 Zone Defense.
With consistent practice and dedication, along with a solid understanding of the 1-1-3 Zone Defense fundamentals, your team can gain a potent defensive weapon that greatly enhances their chances of success on the basketball court. Remember, the key to triumph lies in communication, coordination, and commitment to the core principles of this innovative defensive strategy. Good luck in implementing the 1-1-3 Zone Defense, and may it lead you to countless victories!
FAQ: Frequently Asked Questions about the 1-1-3 Zone Defense
We understand that diving into the world of strategic basketball defenses can raise many questions. To help address these concerns, we’ve compiled a list of frequently asked questions that will provide you with quick, insightful answers relating to the 1-1-3 Zone Defense. Let’s get started!
1. Who should play each position in the 1-1-3 Zone Defense?
Usually, the point guard guards the point, a shooting guard, small forward, or quick power forward covers the free-throw line area, and the remaining two forwards and the center take positions across the court near the baseline.
2. When should a team use the 1-1-3 Zone Defense?
The 1-1-3 Zone Defense can be employed when the team needs to protect the paint, force turnovers, or disrupt the opposing team’s offensive rhythm. Also, it can be tactically deployed to seamlessly transition to other defensive setups like the 2-3 zone.
3. Can the 1-1-3 Zone Defense counter strong three-point shooting teams?
Yes, by emphasizing quick rotational adjustments, efficient overlapping, and strong communication, the 1-1-3 Zone Defense can effectively contest and limit open perimeter shots for opposing teams.
4. How can the 1-1-3 Zone Defense be adapted to guard a dynamic offensive player?
In this scenario, the top defender can focus on containing the star player’s movements, while the other defenders remain alert and provide help defense when necessary.
5. Can the 1-1-3 Zone Defense be used to set traps and force turnovers?
Yes, the 1-1-3 Zone Defense can incorporate trapping in the half-court and emphasize aggressive deflection tactics to force turnovers and create fast-break scoring opportunities.
6. How important is communication in the 1-1-3 Zone Defense?
Communication is vital in the 1-1-3 Zone Defense, as it relies heavily on constant, effective communication between players to maintain defensive positions, coordinate rotations, and successfully execute defensive responsibilities.
7. What drills should be practiced to improve the 1-1-3 Zone Defense?
Drills focusing on intensity, quick rotations, anticipating passes, closing out on shooters, and securing rebounds will help players master the various aspects of the 1-1-3 Zone Defense.
8. Can the 1-1-3 Zone Defense be used full time or only during specific situations?
While the 1-1-3 Zone Defense can be the team’s primary defensive strategy, its full potential can be realized when deployed tactically, adapting and transitioning to other defensive setups to counter specific offensive approaches.
9. What are the most common offensive strategies used against the 1-1-3 Zone Defense?
Offenses often attempt to exploit the 1-1-3 Zone Defense through quick ball movement, exploiting gaps in the zone, and implementing an emphasis on perimeter shooting to stretch the defense.
10. How can a team improve rebounding in a 1-1-3 Zone Defense?
Instilling proper boxing-out techniques, emphasizing the importance of secure positioning, and encouraging players to be aggressive in pursuing rebounds can help improve a team’s rebounding ability within the 1-1-3 Zone Defense framework.


Featured Posts
- No pillar pages found.