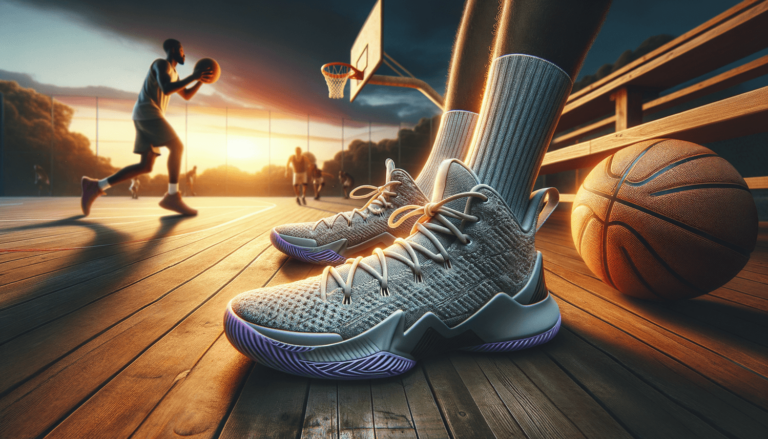
How to Tie Basketball Shoes?
Written by: Basketball Universe
Last updated:
As a basketball enthusiast, you already understand the importance of a well-tied pair of shoes on the court, but how much do you know about securing those laces for peak performance? Welcome to a fun and professionally crafted guide to help you expertly tie your basketball shoes for optimized support, traction, and style. Whether you’re a seasoned pro or just starting out, mastering this technique is essential in achieving a competitive edge, reducing the risk of injury, and boosting your confidence on the court. So, let’s jump in and elevate your game with an in-depth breakdown of the art and science of basketball shoe tying!
How to Tie Basketball Shoes?
1. Put on the shoes, ensuring your heel is snug against the back and your toes have wiggle room.2. Pull each lace tight from the bottom up, creating equal tension across the shoe.3. Use the overhand method, making a basic knot by crossing one lace over the other.4. Create loops (also known as bunny ears) with each lace end.5. Cross one loop over the other, tucking one through the hole created between them.6. Pull both loops tightly for a secure knot while adjusting lace tension, if necessary.7. Optionally, double-knot for added security or provide more support by utilizing loop locks.
Why Tying Your Basketball Shoes Matters
As avid fans of basketball, we often prioritize the right shoes for various aspects like traction, cushioning, stability, and style. However, we tend to overlook the crucial significance of tying up those sneakers securely. Perfectly tied basketball shoes can immensely enhance your on-court game, and if done correctly, they provide proper support and reduced injury risk. So, let’s delve into the world of lace tying techniques, their importance, and the ways to optimize for peak performance on the court.
Finding the Right Basketball Shoe Fit
Before you start learning how to tie your basketball shoes, it’s essential to first find the perfect fit. A well-fitting shoe provides a snug but comfortable fit that allows for secure locking of your feet, preventing blisters and unnecessary foot movement. When trying on basketball shoes, keep these crucial points in mind:
Measure Your Feet
Carefully measure your foot size by standing on a white piece of paper, outlining your foot with a pen, and measuring the distance from the heel to the longest toe. It’s best to do this measurement in the evening as our feet slightly expand throughout the day. Also, measure both feet and use the larger measurement when purchasing.
Consider Socks
Wear the same socks you’d use for games or practice when trying on basketball shoes. Different socks thicknesses can impact the fit, so make sure you’re wearing your go-to pair.
Comfortable Toe Box Space
Ensure the toe box has enough space (about a thumb width) between your longest toe and the shoe front. A tight region in this area may lead to blisters, ingrown nails, and other painful conditions.
Secure Heel Lock
Your shoe must lock your heel securely in place without excessive pressure. Confirm your heel doesn’t slide up and down when walking, running or pivoting. The right heel lock contributes to stability and better control on the court.
Midfoot and Arch Support
Make sure the lacing system can sit comfortably and supportively around your midfoot while providing arch support. Basketball shoes laced too tightly may cause pain or numbness, while too loose may lead to instability and injury during sudden movements.
Effective Techniques for Tying Basketball Shoes
After finding your best-fit basketball shoe, it’s time to learn some effective lace-tying techniques. There is not just one perfect method to tie basketball shoes, and it’s crucial to explore different techniques to find the one that suits your needs, comfort, and style the most. Here are three widely used lace-tying techniques for basketball shoes:
Basic Lace Tying Technique
The basic technique applies the overhand method to create a tight and secure knot, but with a few twists to cater to basketball foot support. Here’s a step-by-step guide to the basic lace-tying technique:
- Put on the shoe, ensuring your heel is snug against the back and your toes have wiggle room.
- Pull each lace tight from the bottom up, creating equal tension across the shoe.
- Use the overhand method, making a basic knot by crossing one lace over the other.
- Create loops (also known as bunny ears) with each lace end.
- Cross one loop over the other, tucking one through the hole created between them.
- Pull both loops tightly for a secure knot while adjusting lace tension, if necessary.
- Optionally, double-knot for added security or provide more support by utilizing loop locks.
Heel Lock Technique
A popular method among basketball players is the heel lock technique, which provides extra ankle and heel support. The technique employs the additional lace holes usually found on the shoe’s collar. Here’s a step-by-step guide to the heel lock technique:
- Start with the basic lace tying technique, stopping just before the top lace holes (right below the collar).
- Insert the laces into the last lace holes, creating two loops (also called “lace locks”) by leaving extra lace outside the shoe.
- Cross the laces and feed them through the opposite loops.
- Pull the laces tight to create a secure heel lock. You should feel the pressure on your ankle, providing additional support.
- Create basic loops (bunny ears) with the lace ends and tie a secure knot.
- Optionally, double-knot the loops for additional security.
Loop Locks and Knots for Added Support
This technique involves creating special loop locks for greater foot support and minimizing ankle injuries. Here’s a step-by-step guide to the loop lock technique:
- Start with the basic lace tying technique, stopping at a point on the laces where you need extra support (usually around the midfoot or the top).
- Create a loop with the lace, and thread the end through that loop on the same side.
- Repeat on the other lace, creating a loop and threading the lace end through it.
- Pull the laces tight to ensure the loop locks are secure.
- Tie the remaining laces with the basic technique of loops (bunny ears) and secure knots.
- Double-knot the loops for additional security, if desired.
Personalizing Your Lace Tying Techniques
With a solid understanding of the popular lace-tying techniques for basketball shoes, you can mix and match as per your preferences, style, and individual foot support needs. Consider the following adaptations:
High vs. Low Traction
For players who need more freedom of movement, loosen the top part of the laces while keeping the laces tight across the midfoot. This approach works well for players who focus on speed and agility. However, players who need more stability (like post players), may choose to keep their laces tight from toe to collar.
Relieving Pressure Points
If there’s a specific area that causes discomfort, skip a pair of eyelets during the lace-up process. By avoiding the problematic area, you can reduce the pressure and focus on providing good support elsewhere.
Choose the Right Laces
A crucial factor affecting basketball shoe tying is the type of lace that you use. Select the appropriate length, thickness, and material that provides the right balance between friction, grip, and elasticity. You can experiment with different materials and lengths before settling on the perfect lace for your basketball shoes.
Keep Your Basketball Shoes in Top Condition
Who knew tying basketball shoes could be so exciting and detailed? But don’t forget, good-quality athletic shoes have a limited lifespan, and you should consider replacing them at the proper time to avoid injuries and maintain your game’s efficiency. This is especially important for players who spend hours on the court practicing and playing games. Always inspect the outsole, midsole, ankle padding, and other areas to ensure the shoes are in good condition and providing optimal foot support.
To summarize, learning how to tie basketball shoes the right way can significantly impact your game, reducing injury risks and offering the appropriate support to your feet. Experiment with different tying techniques, adjustments, and even laces to find the perfect fit for your feet and your performance. So, go ahead and elevate your game, and remember to always prioritize your foot health and stability on the basketball court.
Additional Tips for Basketball Shoe Maintenance
Now that you know how to tie your basketball shoes for optimal performance, let’s explore some additional tips for maintaining your shoes and ensuring their longevity. These simple yet essential practices will keep your basketball shoes in excellent condition, preserving their support, cushioning, and functionality for the matches to come:
Keep Them Clean and Dry
Stains and dirt are a part of the game, but that doesn’t mean you should let them settle on your shoes. Cleaning your sneakers regularly will improve their appearance and maintain their overall quality. Use a soft brush or cloth and mild soapy water to gently clean the shoes’ exterior. Also, keeping your shoes dry is essential, as moisture can lead to odor, mold, and material deterioration. If your shoes become wet, untie the laces, remove the insoles, and air-dry them at room temperature. Avoid using direct heat sources like hair dryers or radiators, which can damage the shoe materials.
Store Shoes Properly
How you store your basketball shoes when not in use also affects their quality and longevity. Keep them in a cool, dry, and well-ventilated location, away from direct sunlight or extreme temperatures. Placing them in a designated shoe bag or breathable sneaker box will protect them from dust and dirt. Shoe trees or crumpled-up newspaper can help retain the shoes’ shape and absorb any residual moisture.
Rotate Basketball Shoes
If you play basketball frequently or practice long hours, consider having a second pair of shoes you can rotate between. Rotating your sneakers allows them to air out properly and reduces the overall wear and tear. Furthermore, it ensures the cushioning and support systems in the shoes have ample time to regain their shape between uses.
Reserve Your Basketball Shoes for the Court
To maximize your basketball shoes’ lifespan, reserve them strictly for the court. Wearing your sneakers outside the gym or basketball court increases their exposure to dirt, harsh surfaces, and potential damage. Additionally, using them only on the court prevents the shoe’s traction from deteriorating prematurely.
Upgrade Your Shoe Insoles
Another way to enhance your basketball shoes’ comfort and support is by upgrading the insoles. Replacement insoles designed specifically for athletic footwear can provide improved cushioning, arch support, and shock absorption. This little investment may greatly benefit your overall performance while offering customized support to your feet.
In conclusion, taking the time to maintain and properly care for your basketball shoes will pay off in terms of performance, durability, and comfort. Tie your shoes strategically, follow these practical care tips, and enjoy every moment on the court as you play the game you love.
FAQs on Basketball Shoe Tying and Maintenance
Are you curious about some commonly asked questions related to basketball shoe tying and maintenance? In this FAQ section, we’ll answer those questions to help you better understand and perfect the art of taking care of your basketball shoes, ensuring peak performance and durability.
1. How often should I replace my basketball shoes?
The replacement frequency depends on multiple factors, including your activity level, shoe quality, and playing style. On average, it’s recommended to replace your shoes every 300-500 miles of active usage, or around 6-12 months of regular play.
2. How do I choose the right basketball shoe size?
To choose the right size, measure both of your feet and use the larger measurement when purchasing. Make sure there’s about a thumb’s width of space in the toe box area, your heel is securely locked in place, and the shoe provides proper arch and midfoot support.
3. What’s the best way to lace basketball shoes for ankle support?
The heel lock technique is an excellent choice for providing extra ankle support. This method makes use of the additional lace holes on the shoe’s collar, creating a secure fit around the ankle.
4. How do I create loop locks?
To create a loop lock, start with the basic lace tying technique and stop at a point where you need extra support. Create a loop with the lace and thread the end through that loop on the same side. Repeat on the other lace for a secure loop lock.
5. Can I use regular shoe laces for my basketball shoes?
You can use regular shoe laces, but it’s best to opt for laces designed specifically for athletic shoes. These laces usually provide the right balance of grip, friction, and elasticity needed for a secure fit and optimal performance on the court.
6. How do I clean my basketball shoes?
You can clean your basketball shoes using a soft brush or cloth and mild soapy water. Gently scrub the exterior, focusing on any stained areas, and then wipe away the soap residue with a damp cloth. Air dry your shoes at room temperature.
7. Can I machine wash my basketball shoes?
It’s generally not recommended to machine wash basketball shoes, as the tumbling and heat can damage the materials and compromise the shoe’s structure. Instead, stick to hand washing and air drying for the best results.
8. Can I keep my basketball shoes near a window or radiator to air dry?
No, it’s best to avoid direct sunlight or heat sources when drying your basketball shoes. High heat can damage the shoe materials, while direct sunlight can cause them to fade or become brittle over time. Air dry your shoes at room temperature in a well-ventilated area.
9. What can I do if one part of my shoe’s lacing system is causing discomfort?
If a specific area is causing discomfort, you can skip a pair of eyelets during the lace-up process, reducing the pressure in the problematic area while still providing support elsewhere on your foot.
10. How do I store my basketball shoes when not in use?
Store your basketball shoes in a cool, dry, and well-ventilated location, away from direct sunlight or extreme temperatures. Use a designated shoe bag or breathable sneaker box to protect them from dust and dirt.
11. Should I use shoe trees or shoe stretchers for my basketball shoes?
Shoe trees can help retain your shoes’ shape and absorb residual moisture, as well as minimize creases and wrinkles in the material. However, shoe stretchers are typically not necessary for basketball shoes, as they can distort the shoe’s structure and compromise its support.
12. What if the lacing system of my basketball shoes doesn’t provide enough support?
If you feel the lacing system is inadequate, consider upgrading your shoe insoles, which can offer improved cushioning, arch support, and shock absorption. Additionally, try experimenting with different lace-tying methods to create a more personalized fit and support level.
13. Can I wear my basketball shoes casually or for other sports?
While you can wear basketball shoes casually or for other sports, it’s best to reserve them strictly for basketball to prevent premature wear and tear, and to maintain the shoe’s traction and support systems. Using them only for basketball ensures optimal performance on the court.


Featured Posts
- No pillar pages found.