How Do They Put Temporary Logos on Basketball Courts?
Written by: Basketball Universe
Last updated:

Picture this: you’re eagerly watching a high-profile basketball game, and you can’t help but notice those eye-catching, temporary logos adorning the court. They seem so prominent, yet they magically disappear once the event is over. If you’ve ever wondered how that sorcery is achieved, you’ve come to the right place! In this blog post, we will unravel the mystery behind those transient works of art, delving into the methods and materials used to showcase those vibrant emblems. Join us as we explore the captivating world of temporary basketball court logos and unveil the secrets behind their grand displays and swift removals. It’s time to become a courtside connoisseur!
How Do They Put Temporary Logos on Basketball Courts?
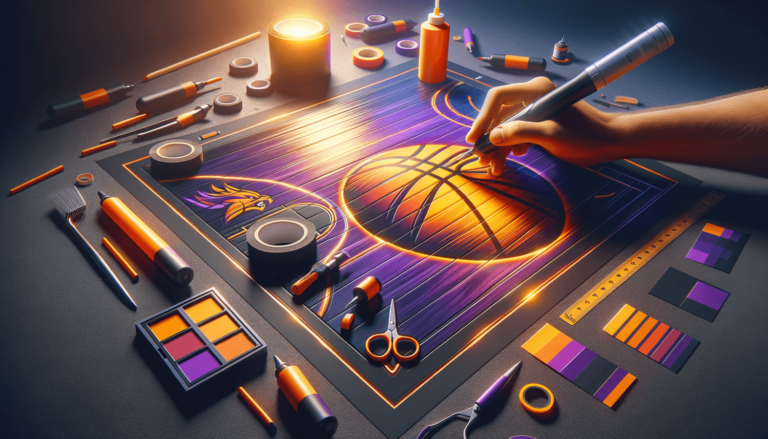
Temporary logos on basketball courts are applied using a combination of adhesive vinyl decals and specially designed paint. For vinyl decals, a large-format printer prints the logo onto vinyl sheets with adhesive backing. These sheets are then carefully applied to the court surface and smoothed out to avoid bubbles or wrinkles. For painted logos, stencil-like patterns are placed on the court, and special water-based, non-slip traffic paint is used to fill in the design. Both methods are designed to be easily removed without damaging the court, ensuring a seamless transition between events and games.
Exploring Different Types of Temporary Logos
Before diving into the application methods, let’s take a moment to discuss the different types of temporary logos you may encounter on basketball courts. Generally, there are two main categories: adhesive vinyl decals and specially designed paint. Each method has distinct advantages and disadvantages, so the one you choose will depend on factors such as event duration, budget, and court type.
Adhesive Vinyl Decals
Adhesive vinyl decals are a popular choice for temporary logos due to their ease of application and removal. These decals comprise a layer of printed vinyl with adhesive backing that sticks to the court surface. The visual appeal of these logos is impressive, with the ability to print intricate and vibrant designs. They also have the benefit of being easy to remove without leaving residue on the court, making them ideal for single-game events or short-term use.
Specialty Court Paint
While not as quick to apply as adhesive decals, using paint to create temporary logos can yield an equally stunning result. This method uses stencils, masking tape, or spray paint templates to transfer the logo onto the court. Once the design is in place, specialized non-slip, water-based traffic paint compatible with the court’s surface is used to fill in the logo. These painted designs can last longer than vinyl decals and usually offer better traction for the players. However, removing and cleaning up the paint requires more effort than removing decals.
Preparation: The Key to a Successful Court Logo Application
As with any project, proper preparation is critical to the successful application of temporary logos on basketball courts. Both vinyl decals and stencil-painting methods have their own unique prep work and techniques to ensure a seamless final result.
Preparing for Vinyl Decals
Preparing a basketball court for the application of adhesive vinyl decals involves the following steps:
- Cleaning the court: The court must be thoroughly cleaned to ensure the decal adheres correctly. Grime, debris, or dust will affect the final result and possibly cause the decal to lift during gameplay.
- Marking the placement: Once the court is clean, it’s time to mark the exact location where the decal will be placed. Measuring and marking the center of the logo will help ensure everything is perfectly aligned before application.
- Final print approval: Finally, the logo must be reviewed in its printed form on the vinyl sheet to verify color accuracy and overall appearance. This is the last chance to address any issues before the design is transferred to the court.
Preparing for Stencil Painting
When using the stencil method, proper preparation involves the following:
- Court cleaning: Similar to vinyl decals, a clean court is essential for proper paint adhesion. Thorough cleaning ensures the paint will go on smoothly and deliver the desired finish.
- Stencil creation: A stencil must be designed and produced based on the logo design. This can be done using materials such as heavy-duty paper, plastic, or even wood. On larger logos, it may also be necessary to divide the design into several smaller stencils to make it more manageable.
- Positioning the stencils: Accurate placement of the stencils is key to achieving a professional result. Some artists use guide marks or measuring devices to ensure the stencil is properly aligned.
Step-by-Step: Applying Temporary Logos to the Court
Once the basketball court is properly prepped, it’s time to apply your chosen temporary logo. We’ll outline the step-by-step processes for both vinyl decals and stencil-painting methods so you can better understand how these logos come to life.
Vinyl Decal Application
Here’s how to apply adhesive vinyl decals to a basketball court:
- Peeling the backing: Carefully peel off the backing from the vinyl sheet. It’s crucial to keep the adhesive side free from airborne debris or accidental touching to ensure an even application.
- Aligning the decal: Using the marked center point, align the decal with the court surface. If the logo is large or intricate, it might be helpful to have another person guide the placement.
- Applying the decal: Starting from the center and working outward, press the decal onto the court using a squeegee, credit card, or similar flat-edged tool. Apply even pressure to avoid air bubbles and wrinkles.
- Trimming excess material: Carefully trim any excess vinyl material around the edge of the design with a razor blade or utility knife, ensuring you don’t scratch the court surface.
Stencil-Painting Method
Here’s how to apply a temporary logo using the stencil-painting method:
- Securing the stencil: Position the stencil on the court, using guide marks or measurements for proper alignment. Secure the stencil in place with painter’s tape, weights, or other methods to ensure it doesn’t move during painting.
- Paint application: Using a roller, brush, or spray paint, apply the specialized court paint to the open areas of the stencil. It’s essential to apply the paint in thin, even coats to prevent bleeding under the stencil edges or creating thick, unsafe playing surfaces.
- Drying time: Allow ample drying time for the paint between coats, as recommended by the paint manufacturer. It’s crucial to let the paint dry thoroughly to prevent smearing or poor adhesion.
- Stencil removal: Carefully remove the stencil from the court to reveal the finished logo. Inspect for any touch-ups and make necessary corrections using similar paint and a steady hand or stencil.
Making an Impact: Removing Temporary Logos After the Game
Now that you’ve had a glimpse into the world of temporary basketball court logos, you might be wondering how these designs are removed following events. Surprisingly, both types of logos can be removed without causing damage to the court surface when done correctly.
Removing Vinyl Decals
Removing adhesive vinyl decals from the court surface is a straightforward process:
- Lifting an edge: Use a razor blade or another thin-edged tool to gently lift one corner or edge of the decal. Avoid scratching or cutting the court surface while doing so.
- Peeling the decal: Slowly and carefully peel the decal away from the surface. It’s important to maintain steady pressure and not rush the process, as remnants of the adhesive may be left behind if the decal is removed too quickly.
- Cleaning residue: Any adhesive residue left on the court can be removed using adhesive removers or goof-off solutions. Just remember to check the court’s compatibility with the chosen cleaner, as some can damage certain surfaces.
Removing Painted Logos
When removing painted logos from the court, the process is a bit more labor-intensive:
- Paint removal: Many court-safe paint removal products are available on the market. These removal agents are designed to loosen the temporary paint for easier cleanup without harming the court surface. Follow the manufacturer’s instructions for safe application.
- Scraping the paint: Use a plastic scraper or flat-edged tool to gently scrape away the loosened paint. Avoid using metal scrapers, as these may scratch or damage the court.
- Cleaning: Once the paint is removed, clean the court with the recommended cleaner to remove any remaining paint residue, ensuring a pristine playing surface for future games.
A Temporary Work of Art: The Final Verdict
Temporary logos on basketball courts are a stunning and impactful way to showcase team pride, sponsorship, or special events. Through the use of adhesive vinyl decals or specialized court paint, these dazzling designs add a touch of excitement to any game. With the right preparation, application techniques, and post-game removal methods, it’s possible to leave a lasting impression with temporary court logos – without leaving a permanent mark on your beloved court.
Preserving Court Integrity: Essential Considerations
When applying temporary logos to basketball courts, it’s vital to take extra care to ensure the court’s playability and condition are maintained. Let’s examine a few of the essential considerations to keep in mind when applying and removing temporary court logos:
Player Safety
Regardless of whether you’re using vinyl decals or paint, prioritizing player safety is crucial. For decals, ensure the edges are smoothed down to prevent slippage, tripping hazards, or catching on players’ shoes. When using paint, confirm that it provides a non-slip grip to aid in optimal game performance. Always strive to avoid creating any uneven surfaces or slippery areas that could endanger the athletes.
Court Surface Compatibility
Considering the wide variety of materials used for basketball court surfaces, always verify the compatibility of the temporary logos with the specific court type. Performing a small-scale test before committing to the full logo application may save you from potential damage to the court surface. Additionally, it is essential to choose adhesive removers and paint cleaning solutions that will not harm the court.
Creating Custom Temporary Logos: A Step-by-Step Guide
Once you understand the ins and outs of temporary basketball court logos, you might be inspired to create a custom logo for your own court or event. Follow this guide to successfully bring your artistic vision to life:
- Inspiration: Begin by brainstorming ideas for your unique logo. This can involve sketching out designs, identifying color schemes, or exploring other sources of inspiration related to your event or team.
- Design: Once you have a clear idea in mind, either design the logo yourself using software like Adobe Illustrator or hire a professional graphic designer to bring your concept to fruition.
- File format: Be sure to export the final design in a format compatible with the application method you choose. For adhesive vinyl decals, export the file as a vector graphic, while a high-resolution raster image is suitable for stencil-painting.
- Printing: If using the vinyl decal method, print the design on adhesive-backed vinyl sheets. For stencil-painting, use a cutting machine or other tools to create a reusable stencil from material such as plastic or mylar.
- Application: Follow the previously outlined application steps for your chosen method, ensuring proper court preparation and accurate logo placement.
- Post-game removal: After your event concludes, be sure to remove the temporary logo using the appropriate techniques to maintain the court’s playability and appearance.
Maintaining a Budget: Cost-Effective Temporary Logo Options
While large-scale, professional basketball events may have ample budgets for temporary court logos, local games, community events, or school competitions may need more cost-effective solutions. A few options can help you stay within budget while still adding excitement to your court:
DIY Stencils
Create your own reusable stencils using affordable materials like plastic sheets, heavy paper, or cardboard. Using an X-Acto knife or similar cutting tool, trace and cut out your logo design. For best results, use a court-safe paint that doesn’t compromise player safety or court integrity.
Low-Cost Printing
If you prefer the adhesive vinyl decal method, consider using an online printing service that offers competitive pricing on large-format printing. Additionally, you might be able to secure discounts for bulk orders or non-profit organizations.
Alternatives to Decals and Paint
For a temporary and budget-friendly option, chalk or temporary court-safe spray chalk may suffice for specific events, especially if longevity isn’t a concern. Just be sure to confirm that the chalk provides adequate grip for player safety during gameplay.
Frequently Asked Questions
For your convenience, we’ve compiled a list of frequently asked questions regarding temporary basketball court logos. If you’re wondering about specific details or troubleshooting issues, this section will address those common inquiries and help you create stunning court logos with confidence.
1. Can temporary logos be applied to indoor and outdoor courts?
Yes, temporary logos can be applied to both indoor and outdoor basketball courts. However, for outdoor courts, additional considerations should be made regarding weather resistance, durability, and UV protection to ensure a long-lasting and visually appealing result.
2. How long do temporary court logos last?
The lifespan of a temporary court logo will depend on the application method and materials used. Vinyl decals typically last for the duration of a single event or up to a few weeks, while stencil-painted logos may last several weeks to a few months.
3. How do I prevent air bubbles or wrinkles when applying vinyl decals?
To prevent air bubbles or wrinkles during vinyl decal application, start from the center of the design and use a squeegee, credit card, or similar flat-edged tool to apply even pressure as you work outwards. This technique helps to push out any air pockets and ensure a smooth finish.
4. What type of paint should be used for stencil-painting court logos?
When stencil-painting court logos, use non-slip, water-based traffic paint that is specifically designed for use on court surfaces. Avoid oil-based paints and any formulas not intended for sports flooring, as these may compromise the court’s playability and player safety.
5. Can temporary logos damage the court surface?
If applied and removed correctly, temporary logos should not damage the court surface. To prevent damage, follow the appropriate application and removal steps, and ensure that the chosen materials are compatible with your specific court type.
6. How long does it take to apply a temporary court logo?
The time required to apply a temporary court logo will vary depending on the method and size of the logo. Vinyl decal application is typically relatively quick, often taking only an hour or two. Stencil-painting methods can require more time, sometimes taking several hours or a full day to complete, including drying time between paint coats.
7. What should I do if the logo starts to peel or lift during gameplay?
If a temporary logo starts to peel or lift during gameplay, address the issue immediately to ensure player safety. For vinyl decals, try smoothing down the edges with a flat-edged tool and applying a small amount of adhesive if necessary. If the issue persists, consider removing the logo entirely and applying a new decal or paint.
8. How do I clean the court after removing a temporary logo?
After removing a temporary logo, clean the court using a damp mop or squeegee. For stubborn adhesive residue or leftover paint, use a court-safe cleaner or adhesive remover according to the manufacturer’s instructions.
9. Can I create a temporary court logo using chalk?
Yes, chalk or temporary court-safe spray chalk can be used as a simple, cost-effective option for temporary court logos. While not as durable as vinyl decals or paint, these alternative materials can suffice for certain events where longevity isn’t a primary concern. Just ensure the chalk provides adequate grip for player safety.
10. Can temporary logos be reused?
Generally, vinyl decals are not reusable once removed from the court surface, as the adhesive backing may lose its effectiveness. However, stencil templates can be reused multiple times for stencil-painting court logos.
11. How do I create a custom stencil for court logos?
To create a custom stencil, begin by designing your logo using software like Adobe Illustrator or hiring a professional graphic designer. Once the design is complete, print it out and use a cutting machine or other tools to trace and cut the logo design onto a reusable stencil material such as plastic sheets, heavy paper, or mylar.
12. Can I apply a temporary logo on a court with existing permanent markings?
Yes, you can apply temporary logos on a court with existing permanent markings. Just be sure to choose a suitable location for the temporary logo that doesn’t obstruct or confuse players during the game. Be mindful of the logo’s size, ensuring it harmoniously fits within the court design and layout.
13. Can I create a temporary logo with a 3D appearance?
While it is technically possible to create a temporary logo with a 3D appearance using special printing techniques or anamorphic art, it’s not recommended for actual gameplay due to safety concerns. A 3D effect may cause visual confusion and increase the risk of slipping or tripping for the players.
Featured Posts
- No pillar pages found.


